Pre-Installation Planning for a Long-Lasting Steel Fence
Evaluating site conditions: soil type, slope, obstructions, and drainage
A good site checkup saves money down the road when problems pop up after installation. Start with soil analysis first. Clay rich ground needs deeper footings because it's prone to frost heave, which actually causes most structural failures in commercial fences according to a study from Ponemon Institute back in 2023. Look out for any hills steeper than about 15 degrees since those areas need special installation methods like steps or rakes to keep everything straight and stable. Before digging starts, mark where all the underground pipes and wires are plus anything on the surface that might get in the way such as big tree roots, rocks, or old junk buried there years ago. Use proper utility finding equipment for this part. Also check how water flows naturally across the area where the fence will go. Water sitting around can really eat away at steel fences fast sometimes making them corrode up to twice as quickly as normal says NACE International's guidelines on corrosion engineering. Lastly make sure there's clear space around the whole perimeter, at least four feet wide, so workers can move around safely while putting up the fence without bumping into things.
Securing permits, finalizing layout, and selecting corrosion-resistant steel fence materials
Engage local building departments early—70% of U.S. municipalities enforce property line setbacks for perimeter fencing, and noncompliance can trigger removal orders or fines. Laser-measure boundaries to produce precise layout plans showing post spacing, gate locations, and elevation transitions. When selecting materials, prioritize corrosion resistance aligned with your environment:
- Marine environments: Triple-layer galvanized steel (minimum 600 g/m² zinc coating per ASTM A123)
- Industrial or high-pollution zones: Powder-coated steel with epoxy primer base for chemical resistance
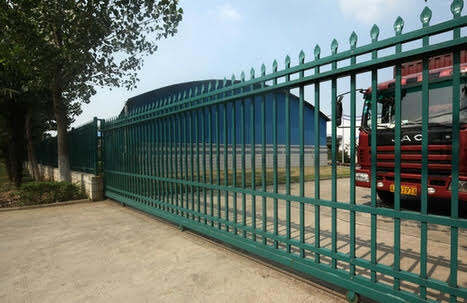
- High-impact or security-critical areas: 12-gauge steel vertical pickets with reinforced frame construction
Avoid repurposing temporary or non-rated fencing for permanent installations. Confirm all material certifications meet ASTM A123 for hot-dip galvanizing and ASTM D3359 for coating adhesion testing.
Precision Post Installation: Depth, Alignment, and Concrete Anchoring
Digging code-compliant post holes with gravel base for optimal drainage and frost resistance
Getting the post holes right from the start makes all the difference for how things hold up over time. When digging, aim for about a third of whatever height the post will stick out above ground level. That usually means around 600 mm deep, though folks in colder areas might need to go as deep as 1200 mm to beat those pesky frost lines. Make sure each hole is roughly double the width of the actual post so there's room enough for good concrete coverage. Throw in some compacted gravel at the bottom too - maybe 100 to 150 mm worth - this helps water drain away properly and keeps excess pressure off the concrete base. Don't skip this part because it really cuts down on problems when winter comes knocking. And remember to double check what the local building regulations say about digging depths before getting too far along with the project.
Setting posts plumb and square, then anchoring with high-strength concrete for structural integrity
To get those steel posts standing straight, place them vertically and check both sides with a level before bracing them temporarily. Keep the space between posts even by stretching string tight across the tops and bottoms. Check corners diagonally to make sure everything lines up properly. The concrete mix should be strong stuff, about one part cement to two parts sand and four parts aggregate. Work it in layers around 150 mm thick, either vibrating or tamping it down thoroughly to get rid of air bubbles. Make sure the concrete slopes away from the post just enough to let water run off naturally. Give it at least two days, maybe three, to cure completely before mounting any panels. Rushing this step can cut the strength by as much as 40% according to building codes. After proper curing, these foundations stand up pretty well against winds over 90 miles per hour without issue.
Secure Panel and Gate Integration for a Rigid Steel Fence System
Mounting steel fence panels with structural brackets and stainless-steel fasteners
Start installing panels from corners or terminal posts first, then secure those pre-assembled sections using heavy duty structural brackets placed about 24 to 36 inches apart. When it comes to fasteners, go for ASTM F1554 Grade 55 stainless steel ones because they really help avoid galvanic corrosion problems, especially important when different metals touch in areas that get wet or salty. Before doing the final tightening, apply some controlled tension around 150 to 200 psi using ratchet straps. This helps eliminate any sagging and makes sure the load is distributed evenly across everything. Check the vertical alignment of each section with a good quality laser level. If there's more than an eighth of an inch deviation anywhere, that means something isn't aligned properly which could weaken the structure or affect how it handles wind loads. Most professionals recommend putting in two to three fasteners at each bracket joint in areas prone to strong winds according to ASCE 7-22 wind zone III and above specifications.
Installing heavy-duty gate hardware with proper hinge reinforcement and latch alignment
When building gate posts, they really need extra structural support. The best approach is to dig down at least 36 inches for double depth concrete footings and add internal cross bracing that can handle the stress from moving parts. Gates actually put about five times more pressure on their supports compared to regular fence sections sitting still. For hinges, go with triple gudgeon models featuring those self lubricating polymer bushings. Keep them around 50mm off the ground surface to stay clear of damp soil which causes rust problems over time. Getting those latches aligned right matters a lot too. Most folks don't realize that misaligned latches are behind almost half of early gate failures according to a survey done by the Fence Manufacturers Association back in 2022. When dealing with automatic gates, make sure everything meets UL 325 standards. That means installing sensors that detect if something gets stuck, waterproof boxes where the gate strikes, plus a way to manually open things if needed. Don't forget about regular maintenance either. Lubricating all the moving parts and checking the tightness annually cuts down replacement expenses by roughly two thirds in the long run.
Rust Prevention and Proactive Maintenance for Steel Fence Longevity
Comparing galvanized vs. powder-coated steel fence finishes for durability and climate suitability
What kind of finish we pick really affects how long something lasts and how often it needs fixing up. Hot dip galvanizing creates this strong bond between zinc and steel that actually protects the metal underneath by corroding first. That's why it works so well in places near the coast or anywhere with lots of moisture and rain over 40 inches per year. For areas with milder weather conditions, regular galvanized steel can last about half a century or more according to studies from the International Zinc Association back in 2021. Powder coatings are great when colors need to stay vibrant longer, resist sunlight damage, and allow creative designs. They perform best in dry climates or city environments where looks count and there's pollution around. But watch out in consistently damp areas because these coatings tend to break down faster unless they get some extra protection through sealants. When deciding what finish to go with, think mainly about what environmental factors will be toughest on the material rather than just how it looks at first glance.
Establishing a maintenance schedule: inspection, cleaning, touch-up, and recoating protocols
A disciplined maintenance routine extends steel fence life by 30–50% and avoids reactive repairs. Follow this evidence-based protocol:
- Quarterly inspections: Focus on ground-contact zones, weld joints, and fastener heads for early signs of rust, blistering, or coating delamination
- Bi-annual cleaning: Use pH-neutral detergent and soft brushes to remove corrosive residues—road salt, industrial fallout, bird droppings, or fertilizer runoff
- Immediate touch-ups: Within 48 hours of detecting damage, sand affected areas to bare metal, apply rust-inhibiting zinc-rich primer, then topcoat with compatible finish
- Decadal recoating: Refresh protective layers every 8–10 years; powder-coated surfaces in high-impact or coastal zones may require recoating as early as year 6
Maintain a digital or physical log tracking all interventions. In aggressive environments—such as coastal, industrial, or high-salt road proximity—double inspection frequency and shorten recoating intervals by 30%.
Frequently Asked Questions
What are the key factors to consider when selecting steel fence materials?
It's crucial to prioritize materials with high corrosion resistance suitable for the environment. For marine environments, triple-layer galvanized steel is recommended, while industrial zones benefit from powder-coated steel. In high-impact areas, use 12-gauge steel with a reinforced frame.
How deep should I dig post holes for a steel fence?
Post holes should be about a third of the post's height above ground, typically around 600 mm deep. In colder regions, depths might increase to 1200 mm to account for frost lines.
How often should I inspect and maintain a steel fence?
A quarterly inspection is ideal for early detection of issues like rust or coating delamination. Bi-annual cleaning, immediate touch-ups within 48 hours of damage detection, and recoating every 8–10 years are recommended to ensure longevity.